


Outdoor DIY
-
 December 09, 2025Outdoor DIY
First, let's start with:
How do you mesure the required height of your deck stairs?
It seems simple; you take a measuring tape and you measure the height against the wall.
I's great when life is that simple!Unfortunately, nothing is level or square in life...
Dont worry for small stairs of 2 or 3 steps.
But deck stairs of 7 steps come 175cm forward from the wall.
And then you might have multiple centimeters difference!
Which in itself is not much of a problem as you wont even notice that when you are climbing your stairs.But, let's assume you are a perfectionist, please bear following tips into account:
- Try to messure your floor to see if it's really level.
- Use a straight plank or ruler and a level.
(for perfectionist, use a laser level please!) - In the example, I've used a standard level and I'm measuring with a standard tape, with 1 hand only.
So you can be sure the height
-
 October 31, 2023Outdoor DIY
How do you attach deck stairs to a wall?
We regularly get the comment from our customers that our kit for deck stairs is not complete because it does not include fixing materials for fixing against the wall.
This is not something we have forgotten, this is completely on purpose!
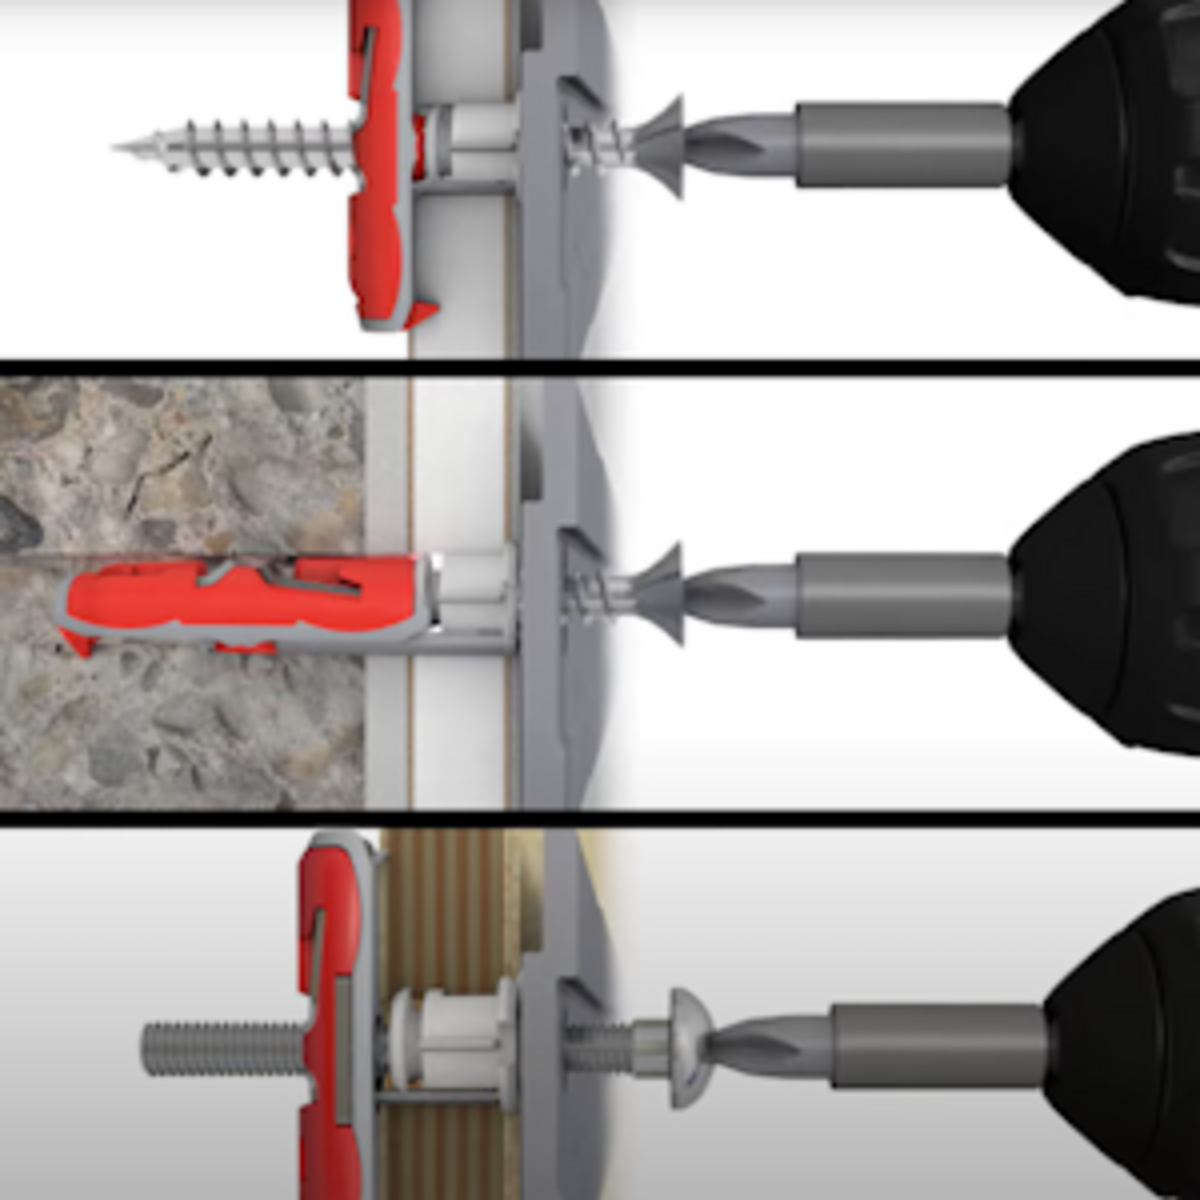
This is because how you attach deck stairs to the wall depends on the type of wall you have, AND whether you have chosen for metal or wooden stringers.
We have no way of knowing that, which is why we do not include fixing materials with our kits!So below is a list of different types of walls and our advice for fixing your deck stairs against these different types of walls or on different surfaces.
My apologies by forehand......
- You ask a technical question, so you get a technical answer! No other possibilitie, I do not want to give ony half advice.
Do you this all way too difficult
- You ask a technical question, so you get a technical answer! No other possibilitie, I do not want to give ony half advice.
-
 September 08, 2022Outdoor DIY
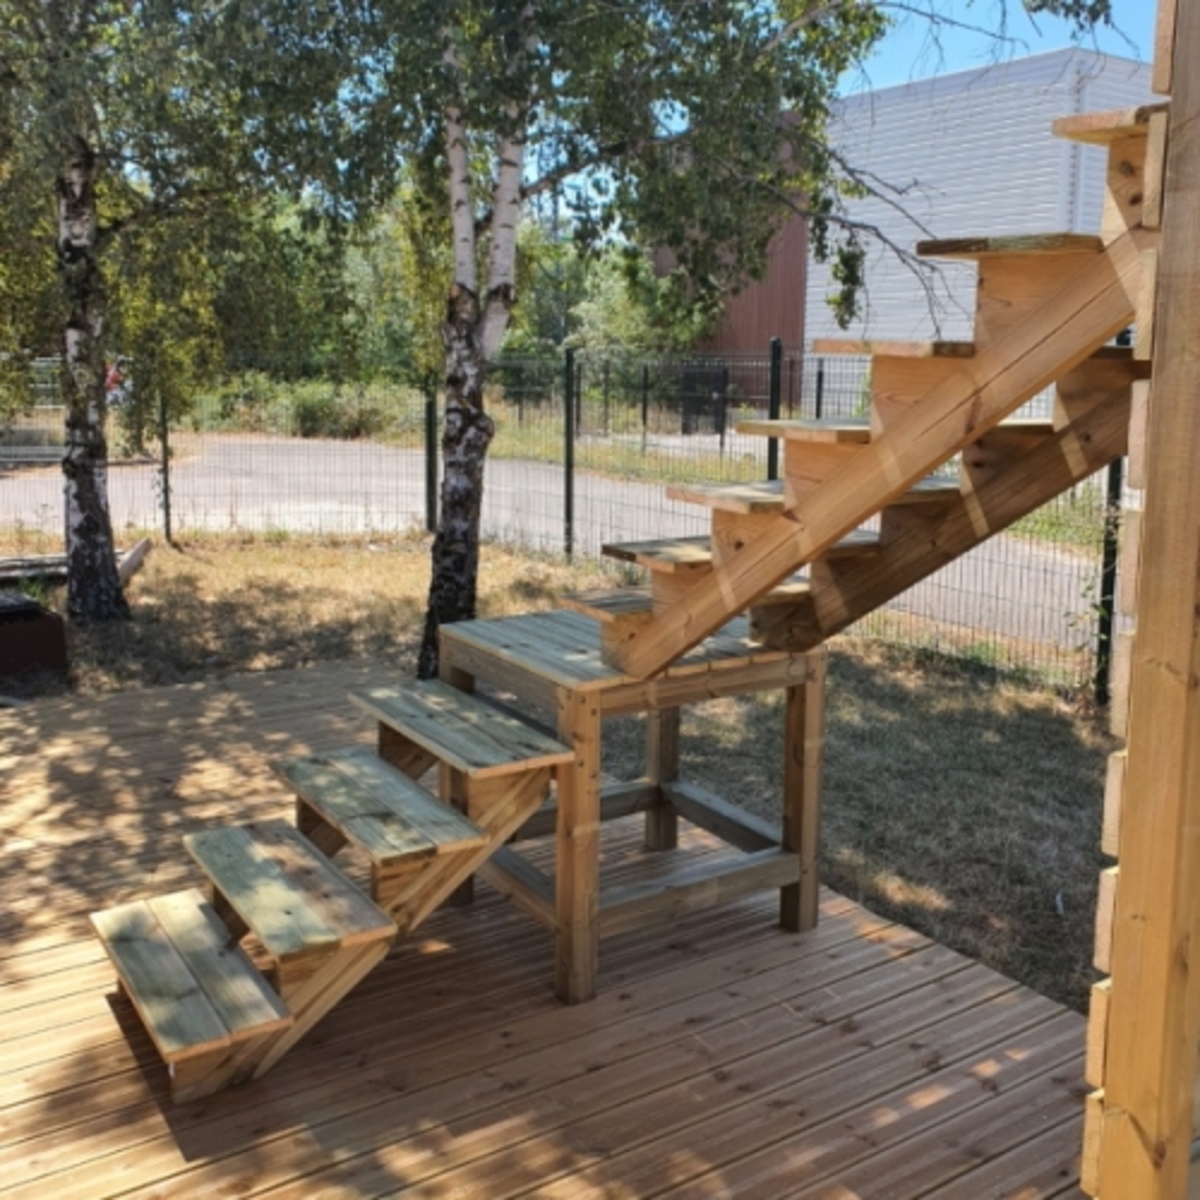
How to choose or to build deck stairs with landing?
With our kits for outdoor deck stairs and landings building your own deck stairs with landing becomes really easy!
Vinuovo offers over 10.000 different possibilities, so no doubt that you will find what you are looking for.In this blogpost we will explain how to compose your deck stairs with landing, the different possibilities and how for example to add banisters to your deck stairs with landing
Unfortunately, not all the possibilities and versions are available on our website yet, we are working hard to get them online as quick as possible.
OK, here we go;
How to choose your deck stairs with landing?
You can use a stair landing in 2 ways:
- stairs
-
 January 26, 2021Outdoor DIY
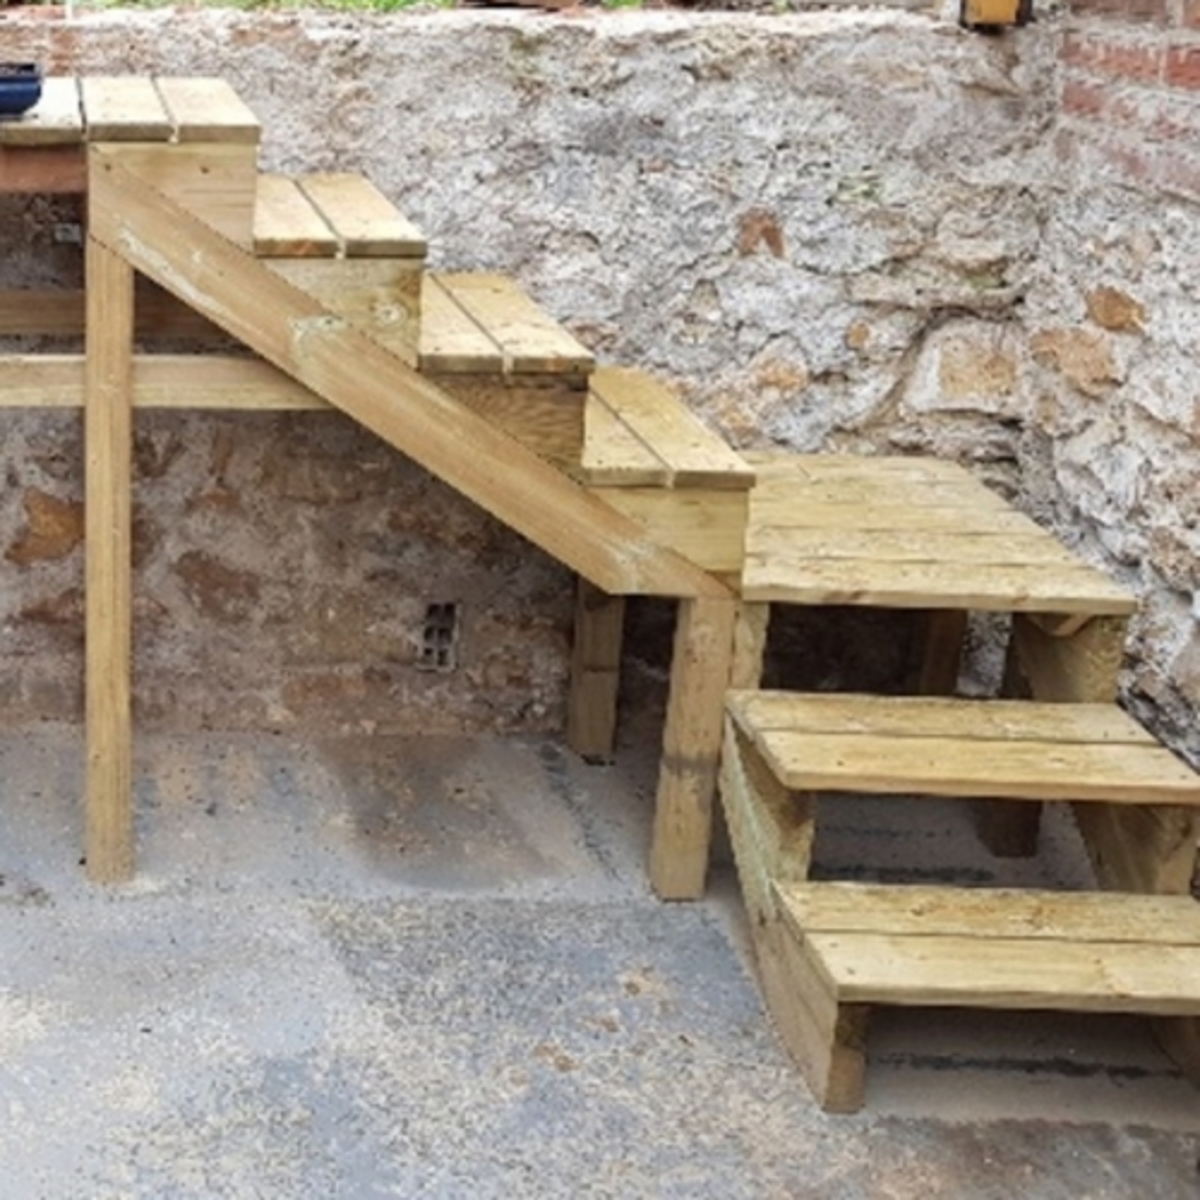
How do you build wooden outdoor stairs?
In this blog post, we will explain how you can easily build outdoor stairs or garden steps yourself.
It is really not as hard as you might think, you can easliy do it yourself!Then let us start by making our shopping list, what do you need in order to build your outdoor stairs?
- at least two staircase stringers for garden stairs
- stair steps for the steps (2 timbers per step)
- screws in stainless steel in order to fix the timbers on the staircase stringers
- galvanized fastening brackets in order to fix the stairs against a wall and on the ground
- an electric or manual screwdriver with the appropriate screwbit
- a drill for drilling holes in the wall in case it is made of stone
- screws for the fastening brackets
-
 February 06, 2020Outdoor DIY
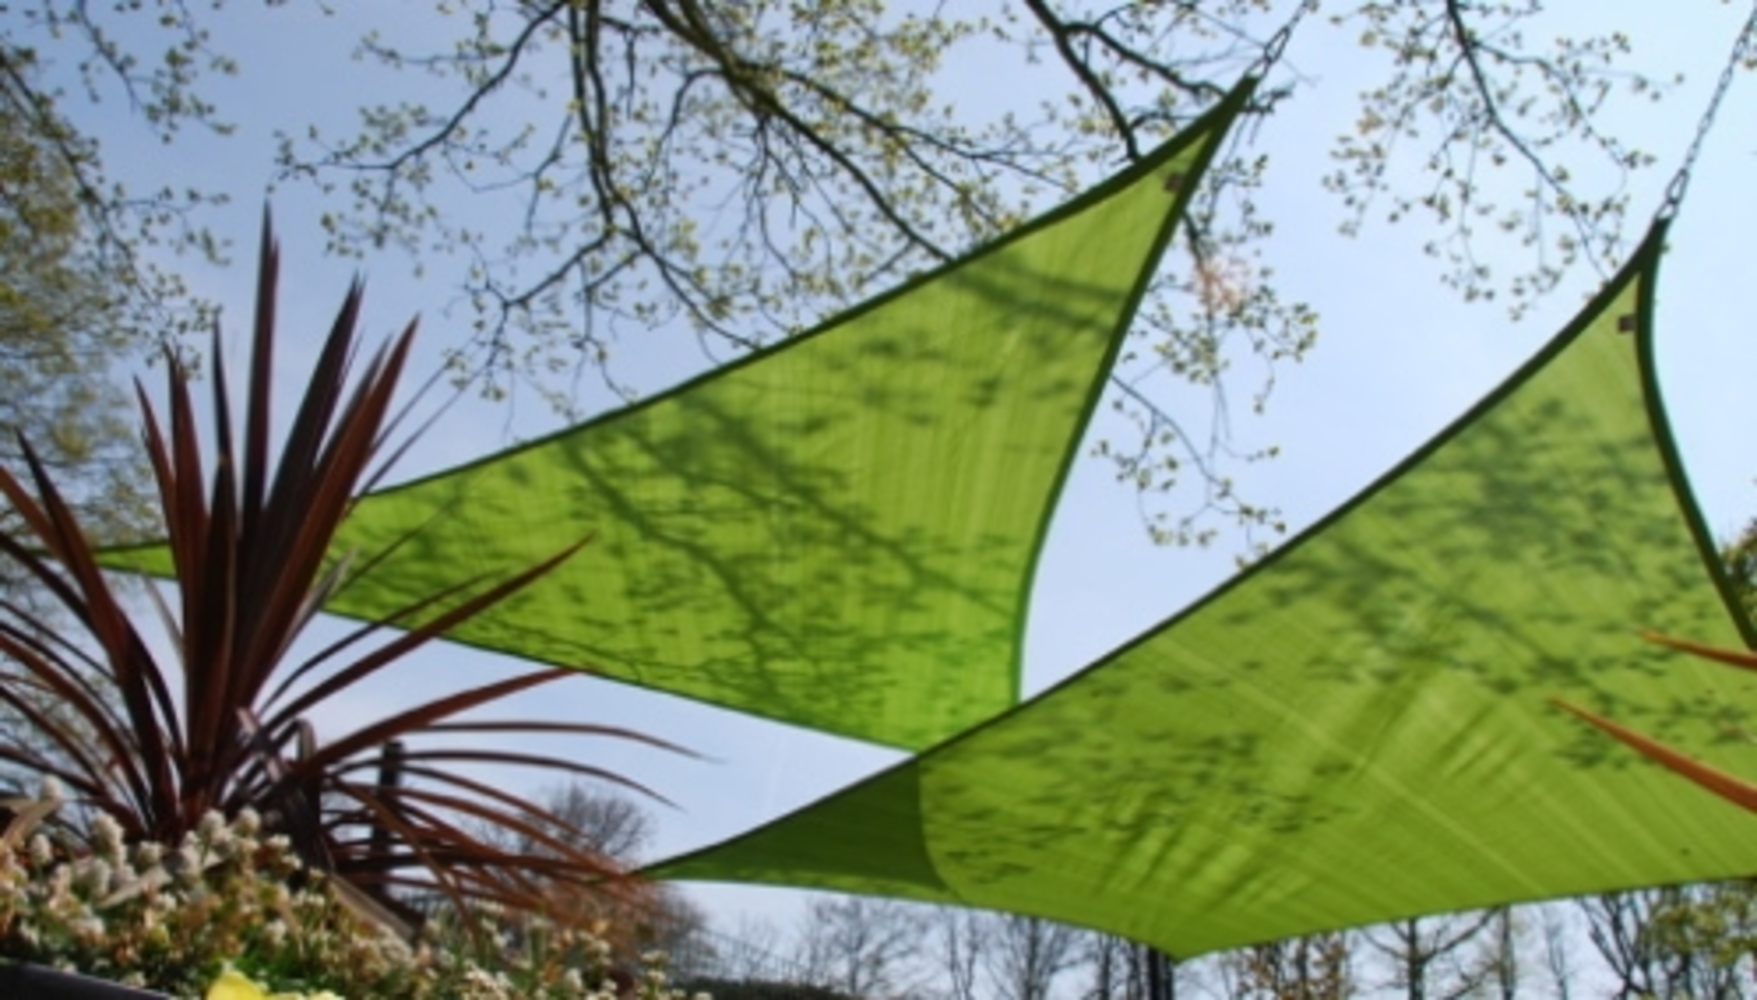
How to mount a nesling shade sail?
Vinuovo has been a reseller for Nesling shade sails for more then 10 years already and we have introduced the Nesling shade sails to the french market! We have installed dozens of them and provided hundreds of customers with advice!
You can buy a very expensive shade sail, but once badly mounted it might cause some severe problems. A correct installed shade sail, can remain in place all season long, from the first sun in spring up to the first snow at the end of the season (except for very heavy storms... (personally I have never demounted a shade sail due to heavy winds, however our offices are based upon a 500 meter high windy hill. We also have many customers in the south of France where the shade sails are exposed to the southern Mistral winds but never a Nesling shade sail has torned! If something goes wrong, it's always due to the fixations or bad mounting...)
-
 January 30, 2020Outdoor DIY
Wood preservation by pressure impregnation: pressure treated wood
Wood preservation is achieved by impregnating fungi and insect repellants. A lot of wood that is used outside is impregnated. This is often done with the aid of a pressure vessel, in which the wood is brought under vacuum, after which the impregnating agent is added. Due to the vacuum, the agent will be introduced into the pores of the wood.
Depending on the quality of the impregnating substances used and the duration of the treatment, impregnated wood meets the application class 3 or 4 (note, the application class is opposite to the durability class!).
- Application class 3: wood exposed to weather conditions without ground contact, then you need durability class 1, 2 or 3 if impregnated class 3.
- Application class 4: Wood exposed to weather conditions with permanent ground contact, then you need durability class
-
 January 20, 2020Outdoor DIY
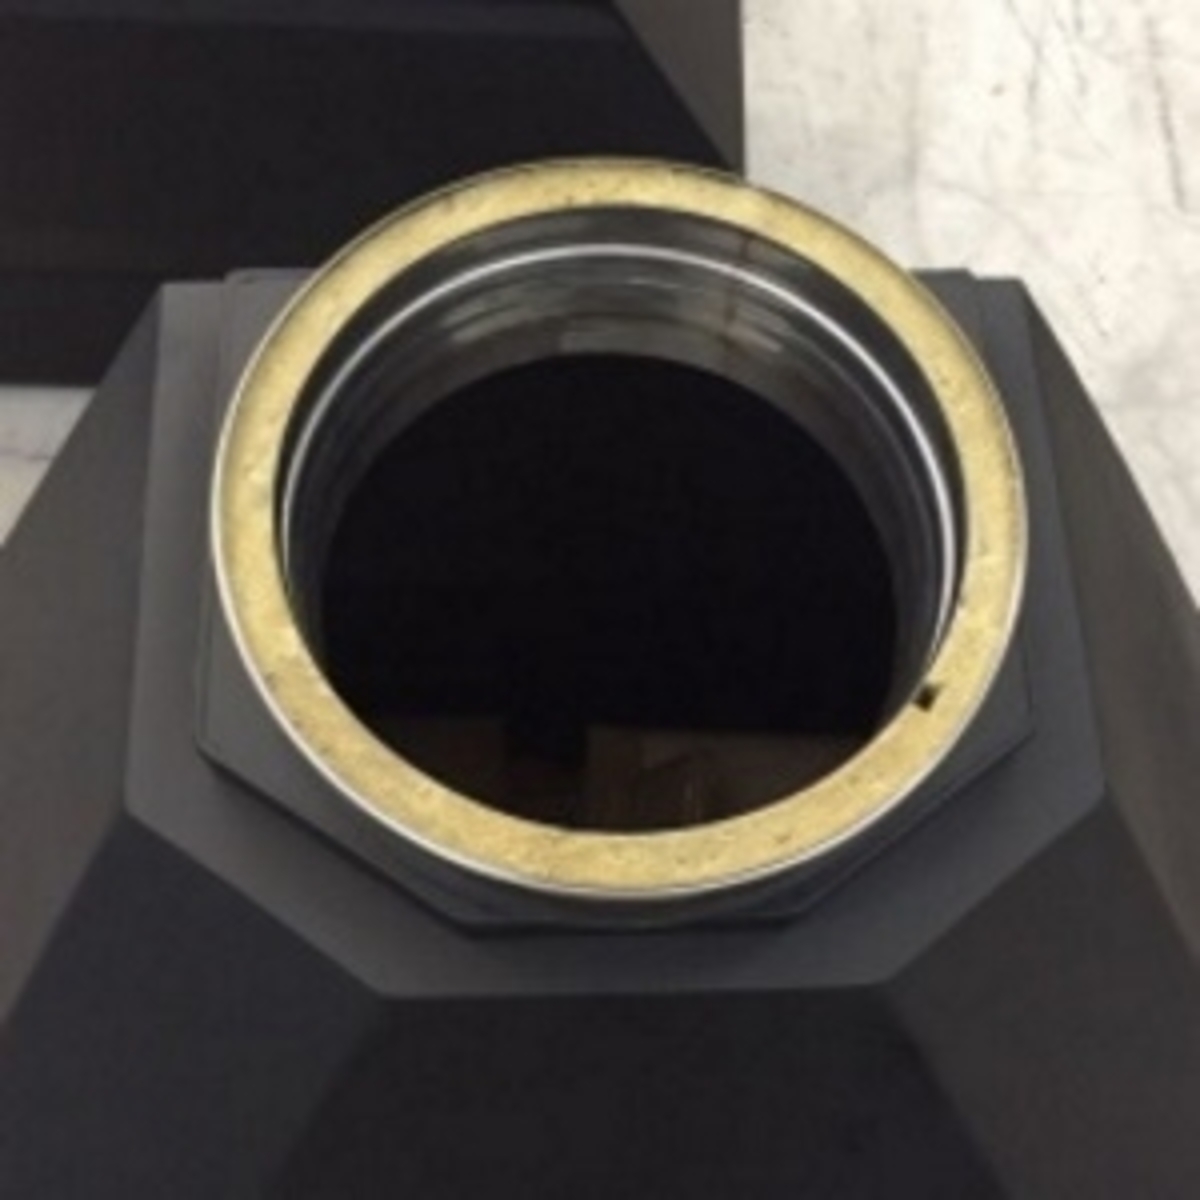
Braai chimney connection width a single or double flue pipe.
All Home Fires Braais are equiped with a standard round opening to connect a single or double wall flue pipe, even the free-standing Braais.
To ease the job, we propose an adapter which you can place on top of the Braai to which you connect standard flue pipes.
The different Braai models have different diameters, please find an overview below; (dimensions year 2020).Exit diameter of the Home Fires Braai:
- Braai freestanding FS800 - Ø 250mm
- Braai freestanding FS1200 - Ø 300mm
- Braai build-in BI800 - Ø 250mm
- Braai build-in BI1000 - Ø 300mm
- Braai build-in BI1200 - Ø 300mm
- Spit Braai build-in BI1200XL - Ø 300mm
- Spit Braai build-in BI1500XXL - Ø 400mm
- Braai build-in "Dirty Harry" DH2300XXXL


